Are you tired of struggling to make secure connections with traditional plumbing methods? Look no further than the Plumbing Crimping Tool! Whether you’re a seasoned plumber or a DIY enthusiast, this handy device can make your projects faster and more efficient. In this ultimate guide, we’ll dive into everything you need to know about using a crimping tool – from choosing the right fittings to mastering the technique for a perfect seal every time. Get ready to revolutionize your approach to plumbing with these tips and tricks!
What is a Plumbing Crimping Tool?
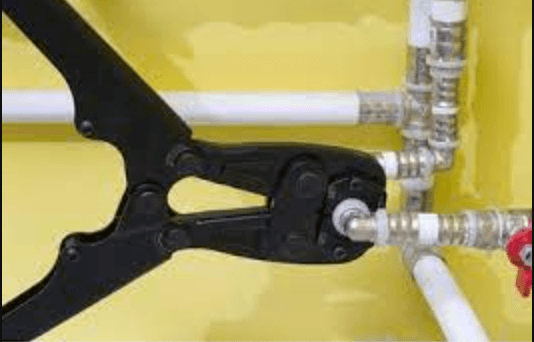
A Plumbing Crimping Tool is a handy tool to have in your toolbox, especially if you’re a plumber. It allows you to easily and quickly join two pipes together. There are different types of plumbing tools, so be sure to choose the one that’s right for your project.
To use a plumbing tool, first make sure that the fittings that you want to connect are properly assembled. Then, place the fitting into the jaws of the crimping tool and tighten the nut on the handle. Finally, push the fitting all the way down onto the pipe until it’s fully seated.
How to use a Plumbing Crimping Tool
When it comes to plumbing, there are few things more frustrating than a leak. And there are few things more annoying than trying to fix it yourself – especially if you don’t have the right tool!
Fortunately, there’s a tool that can help you seal leaks and prevent them from happening in the first place: a crimping tool. And here are some tips on how to use one perfectly.
First, make sure that the tool is properly assembled and ready to go. Some parts – like the jaws – should be tightened with a wrench, while others, like the handle, must be tightened with a finger.
Second, locate the leak. Leaks can come from any number of places in your plumbing system: valves, hoses, fittings or even just dirty lines. Once you know where the leak is, walk around it and look for where water is seeping out (this will help you determine whether it’s coming from above or below).
Once you have located the leaky part of your system, prepare to clamp down! The jaws of most crimping tools work best when they are slightly opened (to create less friction), so start by pushing down gently on the pipe until you feel resistance. Then tighten the handles until you hear or see the pipe snap shut – this confirms that the jaws have engaged properly.
Now release your grip slowly as you examine what happened; if everything looks
Tips for using a plumbing tool
If you’re anything like me, you probably cringe at the thought of using a wrench to fix a plumbing leak. But if you’ve ever tried to use a crimping tool, you’ll know that it’s the real deal when it comes to fixing leaks quickly and easily. Here are some tips for using a plumbing tool:
1. Make sure your crimping tool is properly adjusted. Many tools come with an adjustable range so that you can get the perfect fit on whatever pipe you’re working with.
2. Take care not to over-crimp the pipe. Crimping too tightly can cause damage to the pipe, and may even result in a leaking faucet or fixture.
3. Use caution when using unexpected pressure when crimping the pipe. If you apply too much pressure, your tool may slip and cause injury or damage to the pipe!
4. Always test your work before proceeding – something as simple as water flowing freely can tell you if your crimp is correct and without causing any damage!
Tricks for using a plumbing tool
If you are like most homeowners, you likely have a plumbing tool on hand for use in fixing small leaks and occasional bursts. But if you’re new to the tool or just need a refresher course, here are some tips to help make your crimping experience as smooth as possible:
1. Make sure your crimping tool is properly fitted onto the plumber’s connector. Many tools come with a variety of adapters that can be used to fit them onto different types of connectors. If in doubt, consult the manual or look for a fitting guide online.
2. Keep your hands clean and dry when using the crimping tool. Wet hands will cause the plumber’s connector to slip out of the tool, resulting in inaccurate crimps and potential injury.
3. Start by making gentle pressure against the plunger on the side of the tool with your thumb while holding down the handle with your other hand (this is called “keeping pressure”). As you increase pressure, hold down the handle with more force until you hear a “snap” sound from the connector – this indicates that it has been successfully Crimped. Do not apply too much pressure at once; allow yourself time to adjust to force according to connector size and type.
Conclusion
If you’re ever in need of a plumbing crimping tool, it’s important to know how to use it correctly. Our guide provides tips and tricks for getting the most out of your crimping tool, so be sure to read through it before hitting the streets. If you have any questions or concerns after reading this article, don’t hesitate to reach out to our team for help. We would love to hear from you!